Thursday, December 29, 2011

Great Price Digital Clamp Meter - Pro-Grade 266 - Insulation Tester

Digital Clamp Meter - Pro-Grade 266 - Insulation Tester Review


Click To Buy Best Price from Amazon

Product Feature

  • LCD 3-1/2 digit clamp meter for use by electricians, technicians and servicemen
  • Accurate and reliable instrument for multiple electronic tests & measurements (see description)
  • 9-Volt battery (not incl) will power for up-to 200 hours of operation
  • Includes clamp meter with wrist lanyard, 30" test leads, protective carry pouch, instruction manual
  • 0

Product Overview

AC current 0.1A to 1000A, insulation test 100K Ohms to 2000M Ohms, AC voltage 1V to 750V, DC voltage 1V to 1000V, resistance 100m Ohms to 20k Ohms, continuity test 50 +/- 25 Ohms with audio tone. Measurement method: dual slope integration technical; reading rate 3 reading/sec.; polarity: automatic, indicated minus, assumed plus; overload indication, data hold for all functions and ranges. Operating temperature range 32F to 140F. Dimensions 9"L x 2.7"W x 1.5"H; LCD screed 3-1/2 digit to 1999, 0.5"H; weight 11 oz including battery.

Read More ...


Thanks To : psp2 go Reviews video games Store

Tuesday, December 27, 2011

Great Price UEI DL389 G2 Phoenix Pro Plus Clamp Meter [Misc.]

UEI DL389 G2 Phoenix Pro Plus Clamp Meter [Misc.] Review


Click To Buy Best Price from Amazon

Product Feature

  • Offers the highest combination of functions, features, and safety
  • Features True RMS Detachable clamp head
  • No contractor will have to compromise their safety, efficiency, or comfort
  • Worklight Magnetic mount
  • Three year limited warranty

Product Overview

# Dual display # Non-contact voltage # Easy-view backlit display and worklight (DL379/DL389) # Accepts common industry accessory heads (DL379/DL389) # Includes batteries, leads, K-type thermocouple (DL379/DL389) and zippered case # Three-year limited warranty

Read More ...


Related Products

Tags : video games Store

Sunday, December 25, 2011

Great Price Extech 380941 200A AC/DC Mini Clamp Meter, High resolution mini clamp with Voltage, Frequency, and Resistance

Extech 380941 200A AC/DC Mini Clamp Meter, High resolution mini clamp with Voltage, Frequency, and Resistance Review


Click To Buy Best Price from Amazon

Product Feature

  • 200A AC/DC Mini Clamp Meter
  • 0.9" (23mm) jaw opening, High resolution to 10mA AC/DC
  • Voltage, Resistance, and Frequency, Fast 40 segment bargraph
  • One touch Auto Zero for DC Current measurements
  • Min/Max, Data hold and Auto power off

Product Overview

Extech 380941 200A AC/DC Mini Clamp Meter, High resolution mini clamp with Voltage, Frequency, and Resistance

Read More ...


Tags : video games Store

Friday, December 23, 2011

Great Price Fluke 179/IMSK Digital Multimeter with Fluke 322 Clamp Meter

Fluke 179/IMSK Digital Multimeter with Fluke 322 Clamp Meter Review


Click To Buy Best Price from Amazon

Product Feature

  • Includes: Fluke 322 Clamp Meter
  • AC voltage and current ranges are specified from 5-percent of range to 100-percent of range
  • Recording mode captures the minimum and maximum input values
  • 6000-count, 3-3/4-digit display and a bar graph
  • Runs about 200 hours without backlight on one 9-Volt battery (included)

Product Overview

INDUSTRIAL MULTIMETER SERVICE KIT

Read More ...


Related Products

Tags : psp2 go Reviews video games Store

Wednesday, December 21, 2011

Check Out UEI DL379KIT G2 Phoenix Pro Clamp Meter Kit

UEI DL379KIT G2 Phoenix Pro Clamp Meter Kit Review


Click To Buy Best Price from Amazon

Product Feature

  • The highest combination of function, features, and safety
  • Features True RMS Detachable clamp head
  • No contractor will have to compromise their safety, efficiency, or comfort
  • Worklight Magnetic mount
  • Three year limited warranty

Product Overview

UEI DL379KIT G2 Phoenix Pro Clamp Meter Kit

Read More ...


Friends Link : Motorcycle Store rockwell tools blog reviews

Sunday, December 18, 2011

Check Out Fluke C23 Vinyl Soft Carrying Case for $25.00

Fluke C23 Vinyl Soft Carrying Case Review


Click To Buy Best Price from Amazon

Product Feature

  • Accommodates 61 and 65 Infrared Thermometers and 21 and 322 Clamp Meters
  • Inner pocket to stores test leads or small accessories
  • Belt loop for easy storage and quick access
  • Material: vinyl
  • Dimensions (HxWxD): 225 mm by 95 mm by 58 mm (8.9 by 3.75 by 2.3-Inch)

Product Overview

SOFT CASE,VINYL,BLACK

Read More ...


Related Products

Tags : Motorcycle Store video games Store rockwell tools blog reviews

Friday, December 16, 2011

Check Out Extech MA1500 1500A True RMS AC/DC Clamp Meter + NCV for $199.99

Extech MA1500 1500A True RMS AC/DC Clamp Meter + NCV Review


Click To Buy Best Price from Amazon

Product Feature

  • Integrated non-contact voltage detector
  • True RMS for accurate readings of non-sinusoidal waveforms
  • Built-in non-contact voltage detector with LED alert
  • 2.0-Inch (52mm) jaw size for conductors up to 500MCM
  • Dual 40,000/4000 count, backlit LCD display

Product Overview

Extech MA1500 1500A True RMS AC/DC Clamp Meter Integrated Non-Contact Voltage Detector

Read More ...


My Links : psp2 go Reviews video games Store

Wednesday, December 14, 2011

Check Out Klein CL2100 400A AC/DC True RMS Clamp Meter with Temperature for $151.28

Klein CL2100 400A AC/DC True RMS Clamp Meter with Temperature Review


Click To Buy Best Price from Amazon

Product Feature

  • Backlit display and worklight
  • Magnetic mount and lead storage
  • Non-Contact Voltage Tester
  • Analog Bar Graph
  • Includes case, test leads, thermocouple, and batteries

Product Overview

The Klein CL2100 400A AC/DC True RMS Clamp Meter with Temperature measures AC/DC voltage, AC/DC current, resistance, capacitance, frequency, duty cycle, and temperature. Also tests non-contact voltage, diodes and continuity. The clamp meter features a backlit display and worklight for ease of use in any amount of light, magnetic mount and lead storage and an analog bar graph. The non-contact feature allows quick checks of all types of environments, hazardous extreme temperature ranges or remote areas. The CL2100 includes case, test leads, thermocouple, and batteries. Since 1857, Klein Tools has manufactured the world's finest hand tools.  Today, Klein Tools is the 1 choice among professional tradesmen.  We manufacture more than 3,000 tools and accessories, including pliers, cable and bolt cutters, wire strippers, voice-data-video tools and testers, fish tapes, conduit benders, drill bits, insulated tools, gloves and many other high-quality products. Klein Tools' dedication to quality and innovation continues with products available for professional tradesmen worldwide.

Read More ...


Thanks To : rockwellrk 9000 jawhorse psp2 go Reviews

Monday, December 12, 2011

How to setup an electric motorcycle Kit

What with the recession, a growing environmental awareness, and rapidly rising gasoline prices, more and more habitancy are developing a growing interest in the galvanic bicycle. The galvanic bike has long been a communication staple in Asia and Europe and is just now production its way to the shores of the New World. galvanic bikes can be purchased new from a store or you can turn your existing bicycle to an galvanic hybrid with a conversion kit. Conversion kits come in many separate powers, sizes and prices but by and large, you can fetch a far great and far less expensive galvanic bike from a kit than you can by buying one prebuilt. These kits are easy to setup and want only a few base tools and minimal skills. However, if you need to hire an electrician to turn a light bulb, they are not for you.

For this article, I am using a 350 watt 36 volt front wheel kit as they are far easier to deal with then a rear drive kit. Some features that I am describing in the installation may not be included in your kit, such as a horn button or headlight, but most of what is here will apply to any conversion kit.

Clamp Meter

The very first thing you will need to setup your galvanic bike kit is patience. Don't get in a rush. Take your time and do it right. Many websites claim that a conversion kit can be installed in about an hour. This may be true if all fits in effect perfectly, you have all you need and you have done this before. However, to make this a neat, professional finding job without production any mistakes, it will most probably take you most of an afternoon.

Step 1. Loosen the brake cables where they fasten at the calipers. Turn your bike upside down so that it rests on its cope bars and remove the whole front wheel. Replace the front wheel with the one from the kit. Make sure that the side of the wheel that has the wires protruding from it will be on the left side of the bike once it is turned right side up.

If the axle does not thoroughly fit into the slots of the "dropouts" you may have to file the slots a miniature wider. Use a mill file and file on the back side of the fork. Keep the filing flat and even and do both sides of the fork.

On the axle there are some washers. Slide the whole primary to thoroughly fill any space between the fork and the hub motor. You must use at least one washer on each side of the motor if the sides of the motor housing rub against the fork. You may have to apply a miniature muscle to this depending on the size of your fork. Left over washers can remain on the covering of the fork. Tighten the nuts very tight! If you do not do this, the motor may pull out of the front fork and damage the thin wires to the motor. If the front wheel does not freely spin once these nuts are tightened, then make adjustments to the spacing of the wheel in the fork with the extra washers.

Step 2. Now turn the bike right side up and attach the battery rack. This may want just a tad of trial and error with the spacing to make it fit correctly. Attach the battery mounting plate (this is packed attached to the battery) to the rack.

Step 3. remove the old grips from your cope bars. These may be very tight and want the use of tongs to twist them off or you can use a sharp blade to cut them off. After removing the grips, remove the customary brake levers. To do this, squeeze the brake levers and this will expose the ball at the end of the cable in the brake handle. Pull this out straight through the slot on the top of the cope and slide the lever assembly off of the cope bar. Depending on your bike you may first have to remove one or more of the shift levers.

Step 4. Mount he headlight in the town of the handlebars. Slide the horn button onto the left side of the handlebars and locate near the light. Slide the new brake levers onto the handlebars and replace the cables exactly the way they were on the customary levers. Slide the throttle cope on which ever side you prefer and the plain grip on the opposite end. This may all be very tight and a tiny bit of lubrication may be used to aid in locating these components. Do not tighten down any of the clamps and set screws until you have all positioned to your satisfaction.

Step 5. Manually squeeze the brake calipers almost accomplished and pull the brake cable tight straight through the lock down nut. Tighten the nut. Check the brakes to make sure that they close tightly but do not rub on the rims. Adjust as necessary.

Step 6. Securely attach the controller box to the frame of the bike. As you can see in the photograph above, I chose to attach the controller to the underside of the battery rack. Make sure that where you select to mount the controller, the wiring from the handlebars will be able to reach it. join together the wiring harness as shown by the wiring diagram. The connectors only fit one way, don't force them. Take your time and correlate the colors of the wires to the diagram if primary as well as make sure that all fits snug. Finally, slide the battery into the rack and join together the battery. Fasten down the wiring with the wire ties so that it is neat and will not snag. Leave enough slack in the cable to the motor so that you can turn the handlebars without stressing the cable.

Step 7. Turn on the key and make sure that the battery meter lights up. if it does not, turn off the key and recheck your connections. Now lift the front wheel off the ground and twist the throttle a miniature to see if the wheel turns. If it doesn't, turn off the key and recheck your connections. Your galvanic bike conversion kit is now complete.

How to setup an electric motorcycle Kit

See Also : rockwellrk 9000 jawhorse psp2 go Reviews

Thursday, October 27, 2011

How to Fit a Sectional garage Door

This guide gives information on how to fit a Uk Specification Sectional garage Door and give you some beneficial information to consider before making a purchase.

Things to consider:

Clamp Meter

Will the door be fitted between the opportunity or behind the opening?

Do you want to automate the door?

Do you want the door to have insulation?

These are the main concerns then you have the colour of the door and frame, window options and so on, the list of options is regularly quite long so it's a good idea to wholly read the brochure before deciding.

Between or Behind
In the main sectional garage doors are designed to be fitted behind the opportunity as this allows full drive through height and width to be obtained. however it is not all the time possible to fit your new sectional door fully behind the opening. This could be that you do not have adequate headroom or room behind the piers or in some cases you may not have piers on both sides of the opening.

Headroom
Do you have adequate room behind the lintel and back into the garage to ensure the tracks and gearing can be fitted correctly? A rule of thumb to help you rule this would be to consider you are trying to push a box the total height and width of the garage door all the way in to the garage. If there is something in the way like lights or the ceiling slopes down then you may need to consider the type of door you want to fit, or make the critical adjustments before the door is fitted such as attractive lights out the way or raising / attractive roof joists if possible etc.

Side room
Often gas and electric meters can be fitted on the wall of the garage and you may need to check they are not going to be in the way also. If they are in the way you could get your gas or electric victualer to move them. Providing they don't have to move them too far this is regularly free or they may fee a fee. Call them to see what their policy is on this.

Measuring
Measure you opportunity from brick to brick at the bottom, middle and top of the opportunity and write these measurements down. Now measure the floor to lintel measurements at the left, middle and right of the opportunity and note them down. Do they match? If not put a 4 to 6 foot spirit level on the sides and lintel and floor to see where the opportunity is out of square. If the floor is out by more than 2cm then you may have a gap when the door is closed. consider having the floor levelled before fitting the door. If the piers are not level you may need to order a slightly smaller door if it's being fitted between the opportunity to ensure you can get the door fitted squarely. Then caress your Sectional garage Door victualer to have then order your door for you.

Removing your old door
Be Very particular when removing garage door springs or cutting cables on canopy doors - if in doubt seek professional help!

If you have an existing canopy garage door to take off then you whether need to un-tension the over-head spring or cut the cables. If your door is in fairly good condition you may want to sell it on eBay or in the local free ads paper then you can buy new cones and cable before selling the door or determined un-tension the spring to ensure the cables are still serviceable before selling the door.

Once the spring is done you need to take off the fixings retention the old door in place then lift the door out of the way and take off the frame if it is no longer being used. Now you can setup the new garage door.

Fitting the new sectional door
It is prominent to read and understand the fitting instructions before starting to setup your new door, get any questions answered before starting as this will save you time in the long run.

Once you are customary with the fitting requirements or your single sectional garage door you can begin.

1. Assemble the frame of the door and clamp it into position ensuring it is square and level in the opportunity using packers as needed.

2. Using a favorable masonry drill such as an Sds drill or similar, drill the required fixing holes and insert the supplied plugs. When done you can fix with the supplied fixings / washers using a cordless drill with a socked attachment or a socket set.

3. Once the fixings of the frame are complete, recheck to ensure the frame is still level and square then move on to fitting the tracks. corollary the instructions for fitting the tracks which will involve connecting them to the tracks on the frame ensuring the joins are flat then hanging the tracks from the ceiling joists or side walls. Ensure the tracks are square by measuring the diagonals of the tracks before securing.

4. Fit the springs, depending on the gear configuration of sectional door you have bought you may be fitting a spring on the back of the tracks, springs down the sides of the frame or overhead springs on the frame. corollary the manufacturer's instructions for this and be very particular when handling garage door springs.

5. Once the springs / cables are in place then you will need to insert the rubber strip into the channel on the lowest door panel. A good tip here is to spray the channels with Wd40 or similar to ensure the rubber slides in correctly. Once this is in you are ready to place the panel into position.

6. Place the panel into position and clamp it to the frame to prevent it falling whilst you attach the brackets and wheels. Once you have fitted all of the brackets and wheels you will be able to attach the spring cables if the door has this type of gear.

7. Continue to fitting the rest of the panels ensuring the Brackets And Wheels are on correctly otherwise the door will not open properly!

8. Once you have all of the panels in place you will need to tension the springs, Care should be taken and you should Wear Strong Gloves in case you have a qoute with the tensioning. Sectional garage door springs are very great when tensioned and they can cause some Serious Damage to your hands if you are not careful.

9. Oil your tracks and attractive parts and fit the locking handle if the door is a manually operated door.

10. If the door is to be operated by a garage door opener then fit this as per the instructions ensuring the boom is level and centrally mounted to the door.

Enjoy your new sectional garage door!

If you have any problems and would like some free advice on sectional garage doors or any other types of garage doors then you are welcome to caress us.

How to Fit a Sectional garage Door

Friends Link : uk games and toy store to buy rockwellrk 9000 jawhorse

Monday, October 24, 2011

Check Out Pomona Test Lead Set, Kelvin Clips, Cable W/ Banana Plugs

Pomona Test Lead Set, Kelvin Clips, Cable W/ Banana Plugs Review


Click To Buy Best Price from Amazon

Product Feature

  • 5940

Product Overview

FEATURES: Ideal for resistant measurements below 1 ohm. Compatible with Fluke and Keithley 4 wire test instruments. Four wire measurement using the Kelvin Clip reduces the IR drop in test leads that can cause measurement inaccuracies on 5 1/2 and 6 1/2 digit DMM's Additional banana plug and alligator clip are connected to the shield of the coaxial cables for added shield protection. Clamps and banana plugs are color coded for ease of testing. MATERIALS Banana plugs: Gold plated Beryllium Copper for low contact resistance. RATINGS Operating Voltage: Hands free usage in controlled voltage environments: 45 Vrms maximum. For CE compliance: not intended for hand-held use at voltages above 33 Vrms/45 Vdc. Current: 5 Amps Operating Temperature: +122°F (+50°C)

Read More ...


See Also : Motorcycle Store psp2 go Reviews Automobuy Store

Saturday, October 22, 2011

Science tool for a Molecular Biology Laboratory

To start with, when you begin equipping a molecular biology lab, you need the usual test tubes, beakers, desiccators, pipettes with fillers, and flasks, together with all the essential clamps, stoppers, frames and supports.

The basic furniture will need to consist of enough worktop space, computer station/s, chemical and biological storehouse cabinets, maybe a filtered, controlled environment (heating & cooling, and humidity control). In some cases way control, a gray room and clean room conditions may even be necessary.

Clamp Meter

Since this subject of science deals with organic materials from living cell tissues, it stands to conjecture that temperatures are critical. Most laboratories use refrigerators and freezers, and sometimes surface mounted refrigeration units. Some procedures may need temperatures to be reduced to as low as -86A deg. C.

Centrifuges and microcentrifuges may need to stand on refrigerated and unrefrigerated tabletops for separate purposes.

The heating devices may include a microwave, Bunsen burners, and/or hot plates.

There are a number of calibrated and estimation devices, apart from the glassware, that will be needed in a laboratory, such as certain plastic ware, micro balances and scales, pH meters, moisture meters and thermometers.

Microscopes or electron microscopes acceptable to the study being done, together with camera port and link to computer. These are a part of every laboratory.

There is a large number of apparatus and tool generally determined essential for a molecular biology laboratory. Tissue processing for Dna identification is often an prominent part of molecular biology and many processes need the tool for this, depending on the extent of Dna study and genomics. Here is some of the general apparatus likely to be needed:

* Co2 incubator for cell cultures.
* Vacuum pumps.
* Liquid nitrogen tank.
* Water bath.
* Magnetic stirrer.
* Spectrophotometer.
* Chromatograph.
* Vortex rotators and platform shakers.
* Autoclaves and sterilizers.
* Electrophoresis room and gel casting and documentation chamber.
* Uv Transilluminator.
* Gradient and acceptable thermocycler to amplify segments of Dna.

Then we come to the question of security and security of the environment and of the citizen who work in the laboratory; and most of the following will normally be necessary:
Clothing such as:

* Aprons and lab coats.
* Coveralls.
* Footwear, such as shoe covers.
* Head covers, bouffant caps and face covers, masks.

Gloves:

* Heavy weight latex gloves.
* Thin, disposable latex gloves.
* Nitrile gloves.
* Cotton gloves.
* Vinyl gloves.

For eye security there is a great collection of security glasses, clear and tinted for lazer and Uv work, as well as masks and face shields with and without respirators for security against splashing, fumes and gasses and flying objects. It is prominent in a laboratory to setup an eyewash middle point for emergencies.

Last but not least is all the tool needed for cleaning and sterilizing the glassware, apparatus and even the clothing and furniture used in the laboratory. The cleaning of these items is not always straight forward, and some special procedures need to be followed. You need to have specially designed scrubbers and brushes as well as suitable cleaning fluids and preparations, among other things.

Science tool for a Molecular Biology Laboratory

Visit : rockwell tools blog reviews psp2 go Reviews

Thursday, October 20, 2011

Tips to Test a Car Battery With a Multimeter

When you think that the battery of your car might be low, you can use multimeter for looking if it is authentically low. Basically, manufacture test on your car battery using multimeter is quite easy if you know the settings to use and where you should join together the leads. At this time, this description is going to give you some easy steps to test the battery of your car by using multimeter. So, just take a look at the explanation below.

The first step is to open up your hood and then locate the battery of your car. You have to make sure that you effect the directions from constructor and disconnect the cables properly form the battery.

Clamp Meter

The second step that you should do is to turn off your multimeter. After that, you need to set your multimeter to he 50 volt scale. It will reset the meter and also give more literal, reading.

The third step that you should do is to join together the red lead to the definite battery terminal. You have to be sure for putting the lead on the post of your battery and not just on the cable in a way to fetch the most literal, voltage reading.

The fourth step is to attach the lead of black multimeter to the terminal of negative battery. Once more, you should be sure that you directly put the lead on the post of the battery for getting the most literal, reading.

Lastly, after 15 seconds, you can read your multimeter gauge. If you find that it has digital readout and you have 12 volt battery, it must read at least 9.6 volts running straight through multimeter for it for taking a charge. If you find that it is less than that, then you need a new battery. So, now you can effect some steps above for testing your car battery with a multimeter.

Tips to Test a Car Battery With a Multimeter

Related : psp2 go Reviews rockwellrk 9000 jawhorse

Tuesday, October 18, 2011

How to Stop a Leak Until the Plumber Arrives

A leak in the plumbing is a common home problem. Leaks can be the ensue of a burst pipe, cracked pipe, leaking faucet or shower head, and more. When you have a leak that requires the services of a plumber, it is principal that you stop it right away before the water causes damage to the home or causes a drastic growth to your water bill. The following is a guide on stopping a leak until the plumber arrives to fix it:

Once you detect a water leak, the first thing you should do is turn off the main water valve. This will stop the water from chronic to leak and causing more of a mess. The main water valve is settled near the water meter. Once you have turned off the main water valve, open the faucet to allow the pressure to decrease. The remaining water in the pipes will flow through and once there is no more water pressure, there will be no pressure to push any remaining water through the damaged pipe or damaged plumbing fixture.

Clamp Meter

Once you have successfully stopped the water leak, perceive the plumber. If the pipe leak is small enough, there are measures you can take to temporary stop the leak until the plumber arrives to fix it. The following is a guide on temporary fixing leaky pipes:

Epoxy: You can use epoxy to stop a leaky pipe. It is effective for sealing leaks at pipe fittings and joint fittings. Make sure the water has drained and the area is dry before sealing the leak. Also, you should clean it with steel wool. Use plentifulness of epoxy and then wait for it to cure.

Duct Tape or Electrical Tape: You can temporarily stop a pipe leak by wrapping electrical tape and duct tape nearby the crack in the pipe. Make sure the pipe is drained and dry and then wrap it tight nearby the pipe until the leak is fully covered. Make sure that you start wrapping a few inches away from the leak and then continue down the pipe until you are 2 inches past the leak to ensure you have adequately covered the leak. It should be wrapped a few times and make sure that each wrap is fully tight.

Pipe Clamp: To fix a big crack, get a pipe clamp and a piece of bike tire tubing. First, cut the tube so that it is big sufficient to fit nearby the crack causing the leak. Take a pipe clamp and gain the tube nearby the leak. The tube will consist of the leak until the plumber arrives.

C-Clamp and Blocks: First, place a rubber pad over the leak area. Then, place a small wooden strip on top of it. Use the c-clamp to hold it all in place. The wooden strip will safe the pipe from the pressure of the c-clamp.

These repairs might stop a leak for a few days, but it is principal that you perceive a pro plumber who will be able to constantly fix the leak.

How to Stop a Leak Until the Plumber Arrives

Tags : rockwellrk 9000 jawhorse psp2 go Reviews

Sunday, October 16, 2011

Great Price Ideal 61-766 660-Amp TightSight Clamp Meter

Ideal 61-766 660-Amp TightSight Clamp Meter Review


Click To Buy Best Price from Amazon

Product Feature

  • TightSight bottom display
  • Peak max-min (1ms)
  • Frequency measurement via clamp head or leads
  • 40AAC Low range
  • Two year warranty

Product Overview

61-766 Model Code: AB (part# 61-766) This item features: -Patented backlit TightSight display for viewing in dark, bright or tight locations. -True RMS, capacitance, frequency measurement via clamp head or leads, 40AAC low range. -Voltage: 750.00 VAC [Max], 1000.00 VDC [Max]. -Electrical Resistance: 10.00 MOhm [Max]. -Display Type: Digital. -Jaw Opening: 1.42 in [Max]. -Includes: Test Leads w/Alligator Clips, Carrying Case. -Price is for 1 Each. Model Code  Model Description AAAmps:600.00 AAC [Max], 600.00 ADC [Max], Accuracy:AC Current 1.7pct, DC Current 1.5pct, AC Voltage 1.2pct, DC Voltage 0.5pct, Resistance 1.0pct ABAmps:600.00 AAC [Max], Capacitance:4.0 mF [Max], Frequency:1400.0 Hz [Max], Accuracy:AC Current 1.7pct, AC Voltage 1.2pct, DC Voltage 0.5pct, Resistance 1.0pct, Capacitance 3.0pct, Frequency 0.1pct

Read More ...


Related Products

Recommend : rockwellrk 9000 jawhorse uk games and toy store to buy psp2 go Reviews

Friday, October 14, 2011

Pulse Oximeters for Sale - How to go for

There are many pulse oximeters for sale on the market. The best one for you depends on your needs and budget. According to our research, if you have very poor blood circulation, you probably need to buy one at the top end; otherwise many high potential cheap oximeters will meet your needs.

The technology of pulse oximeter has come a long way. Today, one can find a finger oximeter for under and it weighs only a few ounces. When it was first ready commercially in the 1970's, it weighed about 35 lbs., and had a bulky and clumsy earpiece. The sensor had weight of 3 lb and looked a C clamp attaching to the patient's ear. It was not pleasant and very uncomfortable.

Clamp Meter

There are any types of pulse oximeters: from sophisticated models used in operating rooms to simple fingertip models. The fingertip models are widely used at homes, emergency rooms, and hospitals for spot checks. This narrative focuses on the fingertip models from the home-use perspective.

The finger pulse oximeters for sale on the store can be classified into two groups - high-end and others. The high-end one is exemplified by Nonin Onyx 9500, which costs about 0. The most popular vendors for the second group are Beijing choice and Contec curative Systems. We had tested the Nonin Onyx 9500 against two pulse oximeters from Beijing Choice. We tried to portion their accuracy under discrete physiological conditions. We discovered that all the pulse oximeters have similar operation except when the sick person has very low blood circulation. The Nonin Onyx 9500 produced correct readings, while others failed to register any reading. See the link at the end of this narrative for details on the experiment.

In the second group, the prices range from colse to to over 0. The major differences in the middle of these pulse oximeters are building potential and features, such as pleth graph, alarm, Oled display, memory, Pc interface, and sensor size. Of all the oximeters we carry in our store, they are all very well-built; any way we can still see the differences in the middle of the very low-end ones with the best ones.

Pleth graph is an useful feature which is also the least understood feature. I have talked to many customers and only a few noticed this feature. After some simple explanation, they all expressed concerned in keeping an eye on the graph. The pleth graph shows the convert in the volume of arterial blood with each pulse beat. By watching the pleth waveform, the heart beating pattern is clearly displayed. The amplitude of the wave gives an indication of the blood circulation; the waveform can show some irregular heart beats, such as missing beats and bigeminy.

When a heart sick person is having discomfort, it is important to eye the pleth waveform and report the data to his doctor. Since the hurt is ordinarily transient, a physician may not be able to see the waveform during an office visit.

Pulse Oximeters for Sale - How to go for

See Also : rockwell tools blog reviews psp2 go Reviews video games Store

Wednesday, October 12, 2011

Home Plumbing Problems Solved

A plumbing law that was designed as well as installed properly should rarely cause a problem. Any way problems can crop up regardless of how classic the law is and how well it is taken care of. Pipes start to leak, or worse they burst because they are old, are under a great deal of pressure or because of cold winter temperatures. Other coarse question with plumbing is drains that get clogged. Your shower drain maybe clogged with hair while your kitchen drain is clogged with cooking grease that you should not have poured down the sink.

Home plumbing issues may be a terrible pain and often occur at the worst possible times (such as on a holiday weekend!). Here are some things you can do if water troubles comes calling at your residence.

Clamp Meter

If water is dripping from a pipe or is pouring out of a angle of the room or from the wall then you should immediately turn off the water. When you buy a home all the time find out where the shut off valve for the water is. Turning off the water serves an important purpose- it prevents the likelihood that more serious damage will take place. The same step should be taken if your dishwasher, washing engine or toilet overflows. Stop any more water from flowing in.

The majority of water systems have more than one valve which can be used to shut off the water. For instance most sinks have a hot and cold shut off valve. The valves should be somewhere near the lowest of the fixtures. A toilet will have a valve near the lowest of. Look on both sides of the toilet and you should be able to find the valve.

The main shut off valve that is responsible for controlling all of the water that flows straight through the fixtures in your home is often to be found in the basement or in a crawl space of the house. Or it may be settled face near your water meter. Remember that once you turn the main valve off then it will cut off the total furnish of water in your residence. That includes all sinks, the bath tub and your toilet(s). Grasp the main shut off valve firmly and turn it in a clockwise direction to disconnect the water.

A leaking pipe is not a cause for panic although it may charge fear in your heart initially. The most coarse suspect that a pipe will leak is because it is frosty or because the joint is corroded. In some cases resoldering a joint that is soldered might eliminate the plumbing problem. In other cases tightening a threaded joint may be all that needs to be done. For those occasions when a plumber cannot arrive on your doorstep immediately you can try mending a pipe that has burst with a clamp-on pipe patch. You can also make your own urgency clamps out of rubber and a C-clamp.

Sometimes no matter how true you are with your plumbing you will still suffer a drip, drain or leak at some point in time. Sometimes the question will be something that you can cure yourself and other times you will need to call in a plumber. Here we have examined a few of the possible water problems that could occur in your home. The important thing is to know how to deal with emergencies before they happen!

Home Plumbing Problems Solved

Related : Motorcycle Store uk games and toy store to buy psp2 go Reviews

Monday, October 10, 2011

Check Out Amprobe ACDC-100 AC/DC Digital Clamp-on Multimeter for $102.95

Amprobe ACDC-100 AC/DC Digital Clamp-on Multimeter Review


Click To Buy Best Price from Amazon

Product Feature

  • Relative zero mode
  • Auto power off
  • Data hold
  • Diode Test
  • Audible continuity

Product Overview

  • Large, easy to read LCD display
  • Auto and manual ranging
  • Data hold
  • MAX capture function for inrush current measurements (30 mS response)
  • Diode test
Where accuracy, quality, and newest technology meet. The APBACDC-100 offers superior AC/DC measurement capabilities, highest product quality and enhanced ergonomics with Red, Rubber, Ribs™ design.  With relative zero mode, auto power off, audible continuity and accommodates conductors up to 2.00" in diameter. "Third hand" test probe holder. Rubber over-molded case with built in probes storage. Comes with carrying case, test leads, batteries (installed) and user manual.

Read More ...


Related Products

Thanks To : uk games and toy store to buy Motorcycle Store rockwell tools blog reviews

Wednesday, October 5, 2011

Great Price Amprobe AMB-2 Analog Megohmmeter -Insulation Tester

Amprobe AMB-2 Analog Megohmmeter -Insulation Tester Review


Click To Buy Best Price from Amazon

Product Feature

  • Tests insulation of wires, cables, transformers, motors and generators.
  • Battery powered
  • Helps cut unscheduled downtime and reduce shock hazards
  • Sensitive Ohmmeter for checking resistance of motor windings (AMB-1A and AMB-2)
  • Built-in voltmeter

Product Overview

Battery Ok Test -- Mirror Scale -- Automatic discharge or equipment capacitance for safe removal of test leads

Read More ...


Thanks To : rockwellrk 9000 jawhorse rockwell tools blog reviews

Monday, October 3, 2011

The End of the World - Will it Happen in 2012?

There has been a lot of talk about the date December 21, 2012 lately, all centering on the potential end of the world as we know it. Television documentaries, the up-to-date movie 2012, radio shows, numerous blogs, and a media buzzing with excitement have given some credence to the law that a great cataclysmic event will occur at the end of 2012. With all the commotion, maybe we should gawk this prediction as well. Is there is any validity to this claim, or is it just someone else doomsday scenario that will come and go with barely a whisper?

There are some habitancy who claim that old prophesies, writings, and modern day events are all pointing to a day of disaster that culminates in mass destruction and loss of life. Some quote the quatrains of Nostradamus, the apocalyptic scriptures of the Bible, and other old writing as proof that a cataclysm is coming. More significantly, many habitancy point to the incredibly precise old Mayan calendar which ends suddenly on December 21, 2012, as evidence that the world will come to a sudden end.

Clamp Meter

This is not the first time the end of the world has been predicted. Since near the starting of time, there have been predictions of a catastrophic world ending. It is likely that old cavemen belief the end was near when they saw celestial phenomena like comets and solar eclipses. Certainly, some of the biblical prophets expected a cataclysmic ending of the world, as well as seers in other old cultures.

In more modern times, predictions of doom have abounded along with societal upheaval, wars and conquering armies. As Genghis Kahn's hordes overran eastern civilizations, some were sure the end was near. Napoleon was belief by some to be the anti-Christ who would usher in the end of the world. In the 20th century, many habitancy belief that World War 2 was going to bring the end of civilization, and Nazi leader Adolph Hitler was the anti-Christ or worse. It didn't happen of course, but that hasn't stopped predictions of Armageddon from persisting to gift day.

That said, it's true that just because something hasn't happened yet doesn't mean it won't happen in the future. There are many potential threats that could wipe out the Earth, and they should not be dismissed. Events such as a comet collision with earth, a super volcanic explosion, gamma or cosmic ray bursts, a so-called galactic alignment, or even global warming could all spell doom for the earth. However, how do we know that just because the Mayan calendar ends at in 2012 that the earth will end on that date as well? Some skeptics say this is pure speculate without any basis in fact.

In conclusion, it's probably a safe bet that no one verily knows for sure when the end will occur unless they have the omnipotence of God. And when it comes to God, we can look to the Bible, where Jesus, who claimed to be God's Son, said that no one knows the day or hour of the end except God the Father himself. If Jesus himself didn't know, then how can we know when the world will end? Rather than worrying about a distant event that may not happen, we would do good to live in the present, and do what we can to make ourselves and our world a good place.

The End of the World - Will it Happen in 2012?

Thanks To : rockwell tools blog reviews rockwellrk 9000 jawhorse uk games and toy store to buy

Saturday, October 1, 2011

old Ruins, Monuments and Civilizations of Greece

Greece is known for white-washed buildings with blue-domed roofs, white sands and turquoise waters, old architecture and breath-taking scenery. Which islands to visit can pose a dilemma, how does one select just one Greek Island? If the thought of meandering straight through old monuments that have stood there for centuries, following in the footsteps of Caesar and Cleopatra or looking sites from old civilizations has you eager to start your Greek Islands holidays, then the following list, in no particular order, of the top 5 old monuments in Greece, might help in deciding.

1. Acropolis - Probably the most notable landmark in Greece, the Acropolis was built about 2,500 years ago and has become a sticker of Athens. The Acropolis is made up of any temples. The most notable temple, as well as the largest Doric Temple, is the Parthenon which was dedicated to the Greek Goddess, Athena. Among other sights that visitors can see at this Unesco World legacy Site are the Temple of Athena Nike and the Acropolis Museum.

Clamp Meter

2. Temple of Olympian Zeus - construction of this big temple started somewhere in the 6th century Bc and was completed 638 years later. Out of the former 104 columns, 15 still stand today (with Corinthian capitals) with one (the 16th) lying in pieces from a storm in 1852. The columns of this Greco-Roman Temple quantum 17 meters in length.

3. Arch of Hadrian - Made of Pentelic Marble, it is believed that the Arch was built to celebrate the arrival of Emperor Hadrian who made many charitable donations to the city of Athens. There is no mortar or cement in the construction of the Arch. Instead, the stones are held together with clamps. It stands 18 meters high and was built colse to 131 Ad.

4. Theatre of Dionysus - Built somewhere colse to 600 Bc, this outdoor theatre is placed within the Acropolis and seats 20,000 people. It is the oldest theatre in Greece and honors the Dionysus; God of wine and fertility as well as a patron of drama.

5. Delphi Ruins - carefully one of the most essential relics of Greece, settlements have been discovered at the Delphi Ruins that date back to the Neolithic Era. Visitors to the site can see the Temple of Apollo, the Sanctuary of Athena and the Delphi Ruins Archeological Museum. Other sites to reconsider on Greek Islands holidays contain the Meteora, the ruins in old Mycenae, the Dirou Caves and Mount Olympus.

old Ruins, Monuments and Civilizations of Greece

Friends Link : psp2 go Reviews

Thursday, September 29, 2011

Check Out Fluke 90I-610S 1Amp to 600Amp AC/DC Current Probe for $360.00

Fluke 90I-610S 1Amp to 600Amp AC/DC Current Probe Review


Click To Buy Best Price from Amazon

Product Feature

  • Current Range: 1 to 600 A DC or AC Peak
  • Basic Accuracy (DC to 400 Hz): +/- (2% of reading + 1 A)
  • Output Signal: 100 A range: 10 mV/A | 600 A range: 1 mV/A
  • Frequency Range: 40 Hz to 400 Hz
  • Working Voltage: 600 V AC rms

Product Overview

AC/DC CURRENT PROBE

Read More ...


My Links : rockwell tools blog reviews

Tuesday, September 27, 2011

Great Price Fluke i2500-10 iFlex Flexible Current Probes

Fluke i2500-10 iFlex Flexible Current Probes Review


Click To Buy Best Price from Amazon

Product Feature

  • iFlex flexible current probe expands the measurement range to 2500 A ac
  • CAT IV 600 V, CAT III 1000 V
  • 7.5 mm coil diameter allows measurement in tight spaces
  • Ergonomic design allows easy operation with one hand
  • 1.8 m (6 ft) cable

Product Overview

Unprecedented measurement flexibility The new iFlex flexible current probe (included) expands the measurement range to 2500 A ac while providing increased display flexibility, ability to measure awkward sized conductors and improved wire access. Overview Be ready for anything. The new Fluke iFlex flexible current probes expand the measurement range of the select Fluke meters to 2500 A ac while providing the ultimate measurement flexibility. The iFlex probes connect directly to the meter, displaying current measurements without error prone scaling factors. The 1.8 m (6 ft) cord allows separation between the measurement location and the clamp meter making it easier to view the display. The large loop size and thin cross section allow measurement of awkward sized conductors and improved wire access in crowded spaces. Available in 25 cm (10 in) and 45 cm (18 in) sizes. Safety Conformance IEC/EN 61010-1:2001, 1000V CAT III, 600V CAT IV

Read More ...


Related : rockwellrk 9000 jawhorse uk games and toy store to buy

Sunday, September 25, 2011

Forklift Attachments and Concrete Skip Hire - needful equipment

These attachments can be fitted and removed to make the forklift perform widely dissimilar tasks. Concrete skips may not have the versatility of forklift attachments but they are necessities and concrete skip hire is always ready for whoever wants it. A forklift, which also goes by the name lift truck, is valuable tool in the manufacturing and warehousing industry. The established production of these power trucks can be traced practically to the first quarter of the twentieth century and it is a goods that has continuously evolved over the years into multiple incarnations. What gives a forklift its versatility are the forklift attachments that come with widely dissimilar functionalities. These are designed to do dissimilar jobs and have dissimilar load carrying capacities. Forklifts can be qualified to carry whatever from one to five tons of load. Over the years the fascination for forklifts have evolved so much that there are forklift rodeos conducted where forklift operators eagerly compete.

One of the forklift attachments is the rotator, an attachment that can be rotated and comes in handy for transferring products from one holder to another. Another is slab removal clamp for clamping the edge of marble slabs and lifting them from containers. Drum handler is yet Another one, and it is a mechanical expedient that can be slid into the forks of a truck and is used for loading and unloading drums. Rug rams and rug poles are used for transporting rolls and coils easily. Then there is the battery changer attachment designed to remove commercial batteries and replace them in forklift trucks. Passage platforms for raising workers to required heights can also be attached to a forklift. Also these, there is an endless collection of attachments like forklift buckets, forklift yard blade, forklift snowplow etc. In short, forklift attachments will make people's day in every type of loading and unloading, and building work, and in the clearing and cleaning jobs he has to do.

Clamp Meter

Concrete skips hire is the lasting requirement of those in the building manufactures because these skips are valuable for pouring concrete by means of cranes, tower cranes, or ropeways. Small size skips commonly have the capacity of about half a cubic meter and higher capacity concrete skips have a capacity up to 2.5 cubic meters. Small capacity skips which have a full size gap ,break can be unloaded by the crane operator himself without dismounting. Higher capacity skips might have to be manually or pneumatically operated. Concrete skip hire is ready for shorter periods as well as for longer periods at very competing prices and a hunt over the internet can honestly contribute you with a list of clubs that contribute concrete skips for hire.

Forklift Attachments and Concrete Skip Hire - needful equipment

Tags : rockwell tools blog reviews

Friday, September 23, 2011

Welder repair - equipment List

There are thousands of mend Centers throughout North America that assistance and mend Welders. This tool is used by Hobbyists, Farmers, and manufactures professionals for both Hand and Automation applications. The Welders can be ordinarily classified as being Transformer based, Transformer based with Scr switching, Chopper or Inverter based. High end products such as motor Driven Welders, Synergic Mig Welders, and Plasma Welders fall into these same general categories.

Eventually, this tool will fail and want repair. Large organizations take on in-house repairs but the majority of work occurs in secretly run small businesses. Sufficient Welder assistance and mend requires that the mend Centers have a full range of Test tool and Welding Accessories. The following list outlines a good starting point for procurement of this Equipment:
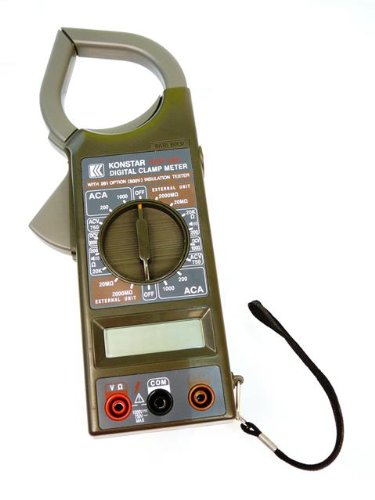
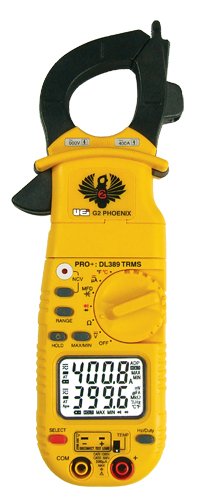
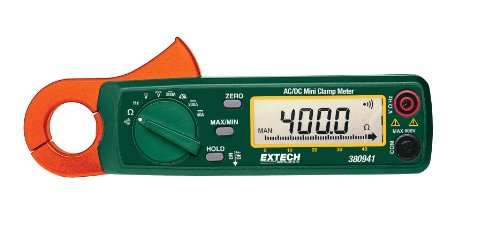
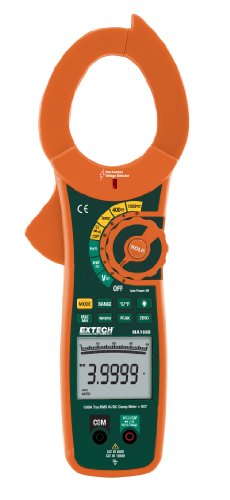
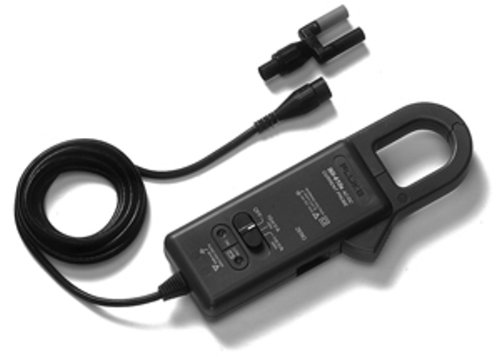
Clamp Meter

1. Customary Ac Power (Mains): 115V, 208/230V singular and 3 Phase, 460V 3 Phase.

These Voltages are used to encompass discrete input power requirements for multiple Welder configurations. Not all Welders run off the same Customary Ac Voltage. A Welder must be tested at the same voltage as it is being used in the field. Any Welder that is capable of 460V operation must be tested at this voltage. Any Bus voltage equilibrium problems will be noticeable only at the higher Ac input voltage.

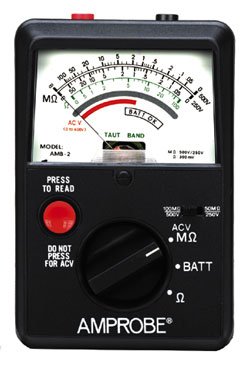
2. Dvm (Digital Volt Meter) and Analog Meter.

A Dvm provides great precision for all measurements. Ensure that your Dvm has a Diode Test position, and is capable of measuring Capacitance. These are prominent features to have. An Analog Meter is also useful. It can furnish a good indication of Power furnish ripple on a Dc furnish through judgment of Meter needle stability.

3. Battery powered Dso (Digital storehouse Oscilloscope).

Mains powered Oscilloscopes have grounded Alligator clips on the Oscilloscope Probes. I.e. The Bnc outer is electrically associated to Mains ground. This can cause signal shorts when a measurement is being carried out. To avoid this question a Mains Isolation Transformer and/or Isolated Probes will need to be used. Battery powered Dso's do not have this issue. tool portability is also prominent in a Workshop environment.

4. Igbt & Mosfet Tester or Component Analyzer.

Tests the functionality of Igbt and Mosfet switching components when a gating signal is applied. A Component Analyzer provides supplementary analysis of the D.U.T (Device-Under-Test) and alleviates the requirement for the Technician to know the configuration of the component leads.

5. Scr Component Analyzer.

Tests the functionality of Scr's with an applied gating signal. A Component Analyzer provides supplementary analysis of the D.U.T (Device-Under-Test) and alleviates the requirement for the Technician to know the configuration of the component leads.

6. Stator Winding Analyzer.

Tests the Stator Windings on motor Driven Welders. Analyzes the windings to determine issues with continuity, and shorted turns. Can be used on both singular phase and 3 phase output windings.

7. Capacitance Meter.

Invaluable for measuring the capacitance of Excitation Capacitors in motor Driven Welders, and other equipment. Some Dvm's do not consist of a Capacitance range.

8. Esr Meter.

Used to portion the Sufficient Series Resistance of Capacitors. Capacitor failures can occur at the lead bonding point. This question can not be seen with a Capacitance Meter, but can list for internal losses. Provides a dissimilar perspective on Capacitor fault analysis.

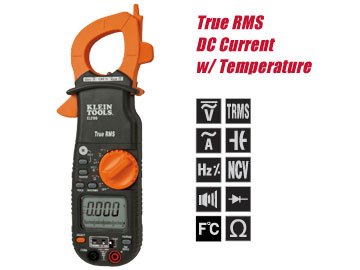
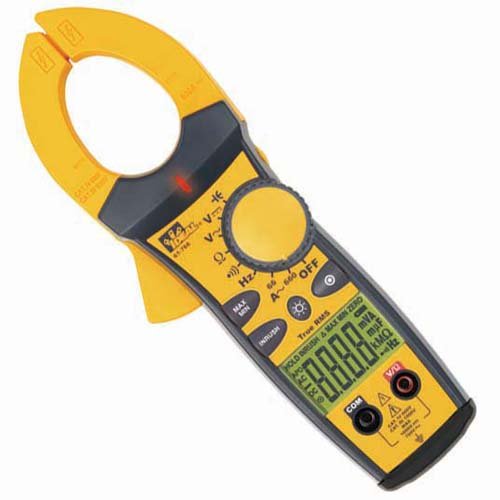
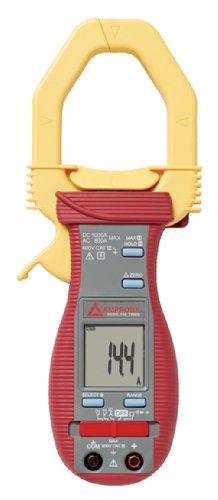
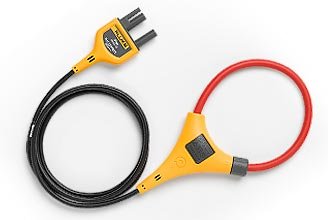
9. Ac / Dc Current Clamp Meter, capable of measuring up to 1000 Amps.

Allows spoton measurement of Customary Ac Power (Mains) Input current, Welder output current and Wirefeeder Motor current. Provides confirmation of Welder calibration.

10. Load Bank (Active or Passive).

Dissipates Weld output current at rates determined by adjustable resistance settings. Used to validate output current capabilities and for Burn-in testing. Active Load banks can furnish variable output characteristics in real time.

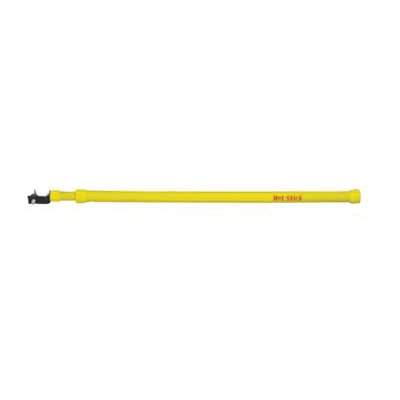
11. Hi-Pot Tester or Insulation Tester.

Used to test for High Voltage leakage conditions (typically to ground).

12. Soldering Iron.

Weller makes some great offerings. Look for Soldering Stations with Esd safe housings. Having the right tips for the job is important.

13. Air Compressor. Up to 120 psi and 600 Scfh.

For general cleaning- Metal dust, and debris. Also used for Plasma Cutter operation.

14. Cylinder gases (Argon, Ar/Co2 75/25).

For Weld testing of units after Repair/Functional Test.

15. discrete Hand tools.

Screwdrivers, Socket wrenches, Wrenches, Pliers, Hammers, Allen keys etc.

16. Torque Driver.

Most screws and bolts need to be torqued correctly to the Manufacturers specification. This is extremely prominent where thermal conductivity properties are important. Igbt's, Mosfet's and Hockey Puck Scr's must be correctly torqued to their Heatsink assembly.

17. Flow meter for torch testing.

Used to check gas flow rates through the torch. prominent for Plasma Welding and Mig applications.

18. Coolant Conductivity Meter.

Used to test the conductivity of coolant that is used in Plasma Welding Systems. If the coolant becomes conductive this can cause the Plasma Welding Torch to come to be shorted. This causes permanent damage.

19. Wireless or Cell phone.

Allows the Technician to describe to Technical maintain staff (Manufacturers representatives) while troubleshooting the Welder.

20. Wirefeeder.

Used for Weld testing Mig (Cv) Welders.

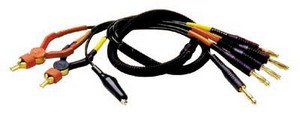
21. discrete Stingers, Mig torches, Tig torches, Leads.

Most Welding Power Supplies don't come in with accessories, unless requested. These need to be ready in dissimilar configurations for Weld testing the product.

22. Loading Dock with Fork Lift or Hoist.

Used to move heavy tool in and out of the workshop.

23. Computer (Desk Top or Laptop) with Internet access.

Used to passage Manufacturers sites for maintain inquiries, and downloading of assistance Manuals. Also, making ready of Word documents, Database passage etc.

24. Esd arresting materials and equipment.

Suitable lengths and quantities of Static Dissipative Matting, Wrist Straps, Foot Straps, Cords, Bonding Points, etc for setting up an Epa (Esd Protected Area). This designated area will be used for transfer of electronic components and Pca's (Printed Circuit Assemblies).

Welder repair - equipment List

Friends Link : psp2 go Reviews

Tuesday, September 20, 2011

Great Price Amprobe ULD-300 Ultrasonic Leak Detector

Amprobe ULD-300 Ultrasonic Leak Detector Review


Click To Buy Best Price from Amazon

Product Feature

  • Includes an instruction manual
  • Hi-Resolution images
  • Unaffected by contaminants, or windy conditions
  • Identifies failing solenoids, valves and bearings
  • Includes headphones, extension tube, parabola

Product Overview

ULTRASONIC LEAK DETECTOR

Read More ...


Related Products

Visit : Motorcycle Store video games Store

Sunday, September 18, 2011

Shapers: Old School Machines Still Being Used Today

Shapers range from particular head machines with fixed spindles to fully self-operating machines with manifold heads. Most shapers are particular head with a cutter head fixed to a rotating spindle. The spindles are threaded on the end and range in size from 1/2" to 1-1/4" in diameter. Many are fitted with different sizes of spindles, as well as with collets for router bits to be used in them. Shapers vary in size and are typically identified by motor's rated power and by the diameter of the spindle. Industrial versions are 5 horsepower (Hp) or greater.

They are used for shaping solid wood components or the edges of panel components. They can be fitted with a material feeder to feed the stock longitudinally or with a sliding table which clamps the material to be fed straight through the cutter head. This application is generally for shaping the ends of component stock. Some have tilting spindles to allow deeper profiles with less cutter projection. There are also duplicate head shapers, generally with one head rotating in each direction. This is to allow the operator to all the time work that the head that is rotating toward the material when approaching, especially when working the ends of material where escape could be a problem. There are also floating head shapers where the material is fed straight through between 2 floating heads to process 2 sides and size in the same operation. There are also rotary and linear manifold head shapers that achieve more complex shaping and edge sanding of components in only 1 pass.

Clamp Meter

Although they achieve similar functions, shapers tend to be quieter than routers. This is because they are belt-driven and turn slower than a router. The router will have a high-pitched whine while a shaper will have a softer humming sound. Other inequity between shapers and routers is that a shaper is a stationary machine designed for higher volume work while a router is more of a hand tool designed for lighter duty work.

An inviting but risky attribute is that shapers are able to run in reverse to be able to achieve certain cuts. It is very prominent to verify the direction setting on the machine, because if you feed a board into a shaper that is turning the wrong direction, the board could shoot out of the machine like a missile. Scm, Unique, Casadei, and Onsrud are a few of many brands of shapers on the used woodworking machine store today.

Shapers: Old School Machines Still Being Used Today

Related : Automobuy Store Motorcycle Store

Friday, September 16, 2011

2 Helpful Pointers to Remember in Using the different Types of galvanic Grills For Easy Grilling

Open grill and caress grill are the two types of galvanic grill that can be use for grilling any kinds of dishes.

Using the galvanic grills can make your barbeque party easier. With just the use of electricity, it will hasten the grilling process of the food. It is an effective cooking equipment that will not let you starve while waiting for the food while barbeque parties. It distributes even heat that will provide a well cooked dish exquisite for the hungry guests. Below are the helpful pointers to corollary in grilling with the dissimilar types of galvanic grill:

Clamp Meter

Open Grill

Some of the open grill have an on or off switch in it. Others have meters that indicate temperature. If you have this type of galvanic grill you should set it to 400 degrees Fahrenheit ideal for grilling. In setting up an open grill you must first find a flat ground so that the grill won't surely tumble. This is to avoid fire and accidents. Before placing the food to the grill, you must preheat the grill first for sanitation. Oil spray is also ideal if the grill does not have a non-stick surface. Place the meat on the grilling face and provide your full attention on to it. Allow the food to cook halfway and use a tong to flip the food for the other side to get cooked as well. Flip the food at the least possible times to have an even cooking on both sides. Know the food's internal climatic characteristic by placing a digital climatic characteristic on it before removing it from the grill. Also don't forget to clean your grill well. You must first unplug it and let it cool completely. Take off the detachable parts and wash it with hot water and soap. Let the grill parts dry completely.

Contact Grill

You can use a caress grill by setting it up on a clean countertop level. Make sure that every part of the caress grill is clean. Plug it for electricity and close the plates right after. Preheat it just like the open grill for sanitation proposes. When the ready light turns on or turn its color depending on you caress grill, you can then put on the food on the heat plate for grilling. Open the grill and put the food in the town of the lower plate. Then close it and clamp it shut for the dish to get cooked. Leave it for about 20 minutes. Precooked dishes only take lesser time to cook. A digital thermometer is also used to know the internal climatic characteristic of the food. When the dish is already ready, open the caress grill to Take off the food. Unplug it and wait for the plates to cool down. When the plates are cooled down it is advisable to wipe the plates with a wet sponge. Allow it to dry before using it again.

2 Helpful Pointers to Remember in Using the different Types of galvanic Grills For Easy Grilling

Related : video games Store

Wednesday, September 14, 2011

Check Out Fluke 87V/IMSK Industrial Multimeter Service Kit

Fluke 87V/IMSK Industrial Multimeter Service Kit Review


Click To Buy Best Price from Amazon

Product Feature

  • Fluke-87V Multimeter with temperature frequency, capacitance 250 µs peak min-max
  • Unique function for accurate voltage and frequency measurements on adjustable speed motor drives
  • Fluke-i400 AC 400A Current Clamp
  • Companion to your DMM to measure up to 400 A AC
  • 80BK-A thermocouple bead probe

Product Overview

Fluke has combined the best selling feature packed 87V Multimeter with the i400 AC Current Clamp. Together they provide the ability to troubleshoot most industrial problems, providing you with the functionality you need to effectively do your job. Additionally, the 87V/IMSK kit represents a significant savings over buying the items separately.Fluke-87V/IMSK Industrial Multimeter Service Kit includes: Fluke-87V Multimeter with temperature frequency, capacitance 250 µs peak min-max6000 counts, 3-3/4 digitsUnique function for accurate voltage and frequency measurements on adjustable speed motor drives and other electrically noisy equipmentFluke-i400 AC 400A Current ClampCompanion to your DMM to measure up to 400 A AC1mA/Amp output guarantees easy reading on you meterOnly current clamp available with a CAT IV 600 V / CAT III 1000 V safety ratingSpecially designed to offer maximum utility in a very compact shape22 of the most useful accessories for making measurements in low energy, electronic applications80BK-A thermocouple bead probeTL75 test leadsAC72 Alligator ClipsLimited Lifetime warranty on Fluke-87V and 1-year warranty on accessories

Read More ...


Related Products

See Also : uk games and toy store to buy psp2 go Reviews

Monday, September 12, 2011

Welding Table - Should You Build One Or Buy One?

One of the very first welding projects you should tackle is a welding table. But wait a minute. Are you sure you want to spend the time and money to build a welding table when you might be able to buy one that is portable, foldable, and inexpensive? I am all for manufacture things myself when I can save a dollar. But its depressing when you spend a weekend fighting with a welding task only to realize you could have just bought the thing and spent your time on a better project.

Lets look a some possibilities so that might help in manufacture a good decision on welding tables, from cheapest and easiest, to more expensive and multi functional.

Clamp Meter

3 options for a light duty table:

A 30" x 20" foldable metal table that is designed for welding and that collapses for storage, can be bought ready to use right out of the box. Approximate cost around 0 plus shipping. The cheapest and easiest might surely be a set of home made sawhorses using sawhorse brackets along with a piece of 11 gauge steel for the welding table top. When not in use, the metal can be stored against a wall and the sawhorses can be disassembled and stored out of the way. You could even laminate a piece of 16 ga sheet to a small sheet of 3/4 inch plywood if you wanted. This would serve in a pinch as a light duty table for welding small parts. Approximate cost around $ 80 ( $ 20 for sawhorse brackets for a half sheet of plywood, for two by fours, for sheet metal top.) A stainless steel food table can be bought that can be assembled quickly. (If you weld stainless food assistance type parts, this is a great choice because you don't want stainless steel getting contaminated with iron particles that will later cause rust and staining.) Approximate cost around 0
2 options for a heavy duty table:

Buy a full sheet of 1/2" half inch or ¾" steel plate along with some 3 inch quadrilateral tubing or angle iron and create a super heavy duty welding table that can be hammered on, heated, welded to, clamped to, etc. Approximate cost for the all the steel is around 0 purchase a heavy duty welding table made with 6 individual precision ground steel plates that are Cnc-machined with 5/8in. Holes in a 2in. Grid pattern that will enable you to clamp virtually anyone of any shape. Cost is around 00 plus shipping.

Welding Table - Should You Build One Or Buy One?

Thanks To : uk games and toy store to buy

Friday, September 9, 2011

Great Price Sinometer Professional digital clamp meter, DT266

Sinometer Professional digital clamp meter, DT266 Review


Click To Buy Best Price from Amazon

Product Feature

  • Clamp meter with high accuracy and good reliability
  • Handy display hold keeps measurements on the display
  • Optional insulation tester kit available
  • 90 days money back guarantee and 1 year limited warranty

Product Overview

Specifications: DCV:0-1000 V/0.8%; ACV:0-750V/1.0%; ACA:0-200-1kA/2.0%; R:0-200-20Kohm/1.0%; Insulation Tester Optional,Test:100k-20M/2.0%-2000Mohm/4.0%; Audible continuity:<50+25ohm; Test leads, 9V Battery, a nice carrying bag and user manual are included.

Read More ...


Related Products

Visit : Motorcycle Store video games Store rockwell tools blog reviews